MIT Racecar Build
Ever since taking Udacity’s Robotics Nanodegree last year, I’ve wanted to try to build the MIT Racecar, a powerful robotics development platform based on an actual MIT class. Its real strength is the number of helpful resources online (most notably Jetson HacksJ) that make the undertaking much easier.
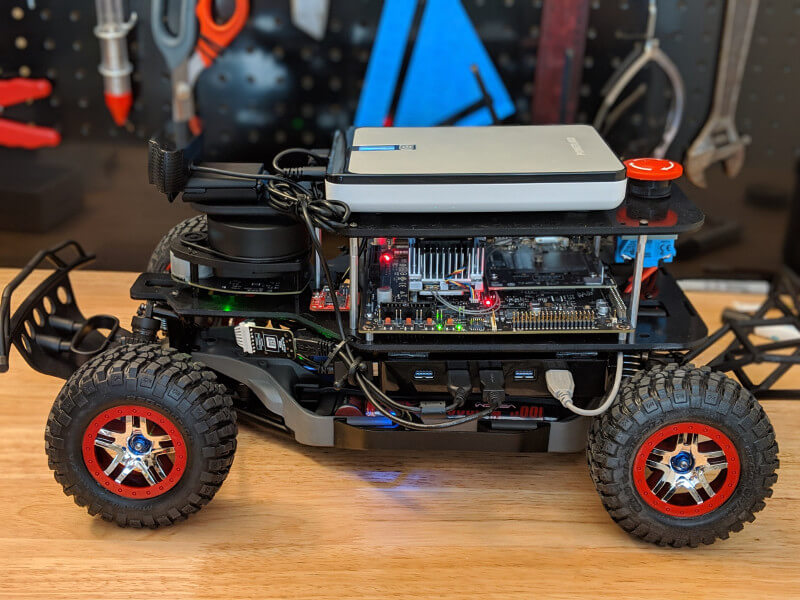
The full racecar is a pretty serious project; it includes a Hokuyo lidar and two(!) 3D cameras. I decided to get a much cheaper lidar and skip the 3D cameras for now.
JetsonHacks already has great videos on how to assemble the racecar, so I won’t go into detail about that. However, I did have some difficulty finding a battery to power the Jetson, and I’ll share my solution here.
Standard Parts
Most of the parts I used were straight off of the JetsonHacks tutorials. These include:
- TRAXXAS Slash 4×4 Platinum Truck – traxxas
- Jetson TX2 – nvidia
- VESC (Speed Controller) – alibaba – Made by Maytech
- USB 3.0 Hub – amazon
- Mounting Hardware – racecarj – Technically you could buy these screws on your own, but I didn’t feel like it
- Spring Upgrade – racecarj – Necessary or the car will scrape the ground with all the added weight
- Sparkfun 9DoF IMU – sparkfun
- 3000 mAh NiMH Battery – Any hobby store will have this
- E-Stop Button – amazon
I also used 3M dual-lock tape to hold everything down.
Modifications
Lidar
Since the Hokuyo lidar costs well over $1,000, I decided to buy the $100 RPLIDAR-A1 (slamtech.com) instead. It has a much smaller range, but I think it will work fine for now. If I have to upgrade later I’ll probably go for the A2.
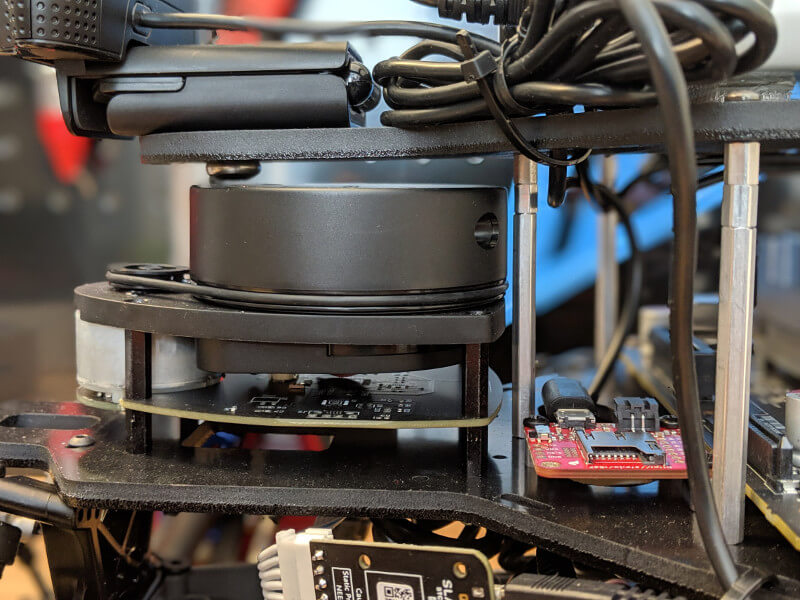
Because the A1 doesn’t fit into the hole in the frame, it actually sticks up higher than the Hokuyo, and I had to add extra standoffs to move the top level up.
Battery
The Jetson needs a separate battery to power it and all of the USB devices. JetsonHacks recommends the Energizer XP18000AB, which has a 19V output for the Jetson and a 12V output for the USB hub. Unfortunately, I couldn’t find it for sale anywhere online, or any other power pack with 19V and 12V outputs, so I had to get creative.

My solution was to buy a PowerAdd Pilot Pro (amazon), and get a barrel jack splitter to power both the usb hub and jetson with 12V. I originally powered the usb hub with a usb to barrel jack cord, but it wasn’t supplying enough power and the lidar would randomly stop working.
Frame
I received a free RacecarJ frame from another Udacity ND student, but it didn’t exactly match the two versions available online. I’m not sure if I got a prototype or what, but I’m not complaining.
I had to drill a few holes in it to mount the lidar and and IMU, but it wasn’t a big deal.
That’s All
I had to drill a few holes and get creative with zip ties to mount everything together, but overall it was really enjoyable. Now let’s see if I can get it running!