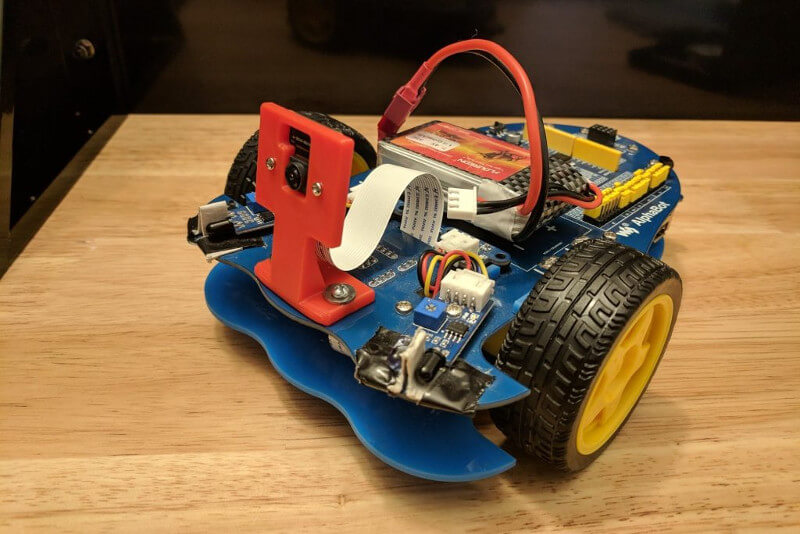
This robot, code-named Blink-192, uses the Robot Operating System (ROS) to do two things: first, it reacts to keystrokes on a computer and drives around; second, it streams video from a raspberry pi camera back to said computer.
Blink-192 is a great example of how ROS can help with any robotics project. ROS connects Blink-192 to a desktop to stream video and receive steering commands with minimal setup and networking.
All source code is available on Github.
This project is based on the Teleop-bot example from Programming Robots with ROS (O’Reilly Media).
This specific Ubuntu image isn’t required, but it comes with ROS pre-installed a creates a wifi access point automatically.
ROS Basics
ROS has become a nearly ubiquitous part of any serious robotics project. I first learned about it as part of the Udacity Robotics Engineer Nanodegree program last Summer, and I couldn’t wait to get started on my own project.
Despite its name, ROS isn’t actually an operating system; it runs on Ubuntu. It’s more of a messaging system that sends messages between different parts of a robot. Let’s take a deeper look at how to develop a project using ROS.
Nodes
A node is defined as any executable that uses ROS to communicate. ROS will manage the lifecycle and messaging of any python script that’s run as a node, so using ROS will easily allow you to run multiple scripts simultaneously.
Topics
A topic is a messaging bus that ROS nodes use to exchange messages. Topics follow the publish/subscribe pattern (similar to Rx and Kafka), so each node can subscribe to any data topics it requires, and then publish whatever it wants.
Blink-192 ROS Setup
Blink-192 ROS graph: Nodes are ovals, topics are rectangles
Blink-192 works using four different nodes:
keyboard_driver – Reads keystrokes and publishes them to the /keys topic
keys_to_twist – Subscribes to /keys and publishes a velocity command to /cmd_vel
motors – Subscribes to /cmd_vel and controls motors
raspicam_node – Publishes video stream to /raspicam_node/image topic
Every node except keyboard_driver runs on Blink-192; keyboard_driver runs on the desktop.
Instructions
In order to control Blink-192, ROS needs to know to network between two computers. Since Blink-192 has its own wifi access point, this is relatively straightforward.
Connect to wifi access point, my SSID starts with blink-192 – Ubiquity
Ssh into Blink-192, and run roslaunch blink-192 robot.launch
Start driving!
The ROS_MASTER_URI variable tells the desktop where to find the ROS master node that it should use, and ROS_IP tells the ROS master how to connect back to it. Launch files are a convenient way of running multiple nodes at once.
That’s it! ROS handles all of the communication back-and-forth between Blink-192 and the desktop.
This is just one example of how ROS can make robotics projects easier. ROS also includes tools for simulation, visualization, parameters, and much much more. Because ROS uses common message types, you can easily add nodes that other people have written as well.